Dance: Windows

May 04, 2022
In this miniseries, I’m going to be walking through a project I’ve been working on recently called Dance. Well, that’s the working name, at least. I’m definitely going to have to do a bit of bikeshedding. To quote the README, Dance is a high performance music visualizer powered by the Windows multimedia API, FFTW3, and DirectX. The goal of this project is twofold: to provide dynamic, exciting, and customizable, visuals for end users while also serving as a reference for the APIs it relies on. The purpose of these blog posts, alongside it, is to provide an in-depth look at novel bits of the source, some thoughts and decisions regarding the architecture, and everything I learned along the way.
Windows, Windows, Windows
Our first order of business is to get set up with an application runtime and a window. We’re targeting Windows using Visual Studio’s C++ Application profile and v142 toolkit. For reference, our C++ standard is 2017. If you want, you can sift through all of these details yourself using Visual Studio. Our second order of business is to create a window for our application to run in, and that’s what I’ll be talking about in this post.
During Dance’s development, I realized that there were several layers to my Window abstraction.
I ended up splitting these into a hierarchy of four classes:
Windowwraps common Window creation, configuration, and destruction. It also provides independent event handling, which is something I’ll go into more depth on later.BorderlessWindowis a little less exciting; it simply provides extended styling options that remove the menu bar and graphical borders.TransparentWindowdoes a bunch of graphical configuration and processing in order to make the window appear transparent against the desktop and other windows. It also provides further subclasses with access to its graphical facilities for real-time rendering, which we’ll of course go into more detail about later.VisualizerWindowhandles application logic and hosts visualizer plugins. Surprisingly, it’s one of the least exciting classes.
Window
Despite its banal naming, Window has an interesting trick up its sleeve with regard to event handling.
In Windows land, events are emitted by windows and handled by the main thread.
Events range from repaint requests to destroy calls to mouse and keyboard input, and for simple applications, handling these events is as straightforward as a switch statement in a while loop.
The canonical pattern for attaching an event handler to a window is WNDCLASSEXW::lpfnWndProc, which, along with a unique identifier and some other details, is passed to ::RegisterClassEx.
Any window created with the corresponding class identifier will forward events to lpfnWndProc, which should have the following signature:
LRESULT WndProc(HWND windowHandle, UINT message, WPARAM wParam, LPARAM lParam);
For simple applications, this is sufficient. However, if you want to create a second window at any point, you’ll suddenly have a second, indistinguishable set of events being emitted to the same handler. This is unacceptable because it prevents us from doing unique logic in each window without some kind of global state. In theory, you could just create another window class and static handler, but this is unsatisfactory for applications that might have a variable number of additional windows.
Based on a StackOverflow answer, my solution takes advantage of ::SetWindowSubclass, which extends the idea of window classes by allowing you to provide an arbitrary DWORD_PTR dwRefData in addition to a new kind of handler callback with signature:
LRESULT CALLBACK WndProc(
    HWND windowHandle,
    UINT message,
    WPARAM wParam,
    LPARAM lParam,
    UINT_PTR dwRefData,
    DWORD_PTR owner);
Every time this new handler is invoked by a window, the dwRefData passed to its invocation of ::SetWindowSubclass is included.
If our Window abstraction passes a pointer to itself as dwRefData, we can trivially turn our WndProc into a dispatch that forwards events back to the corresponding Window object.
Here’s an abbreviated look at the relevant bits of Window’s combined header and source:
class Window
{
public:
    // ...

    HRESULT Window::Create()
    {
        // ...
        ::SetWindowSubclass(
            this->window,
            Window::Dispatch,
            0,
            reinterpret_cast<DWORD_PTR>(this));
        // ...
    }

    LRESULT CALLBACK Window::Message(
        HWND windowHandle,
        UINT message,
        WPARAM wParam,
        LPARAM lParam
    ) {
        // ...
    }

    static LRESULT CALLBACK Dispatch(
        HWND windowHandle,
        UINT message,
        WPARAM wParam,
        LPARAM lParam,
        UINT_PTR subclass,
        DWORD_PTR dwRefData
    ) {
        Window* self = reinterpret_cast<Window*>(dwRefData);
        return self->Message(windowHandle, message, wParam, lParam);
    }

protected:
    // ...

    HWND window;
}
Some references:
- Aforementioned StackOverflow answer on associating data with windows in the event handler
- Microsoft documentation on window procedures
- StackOverflow answer on
WndProcas a class method
Abolishing Borders
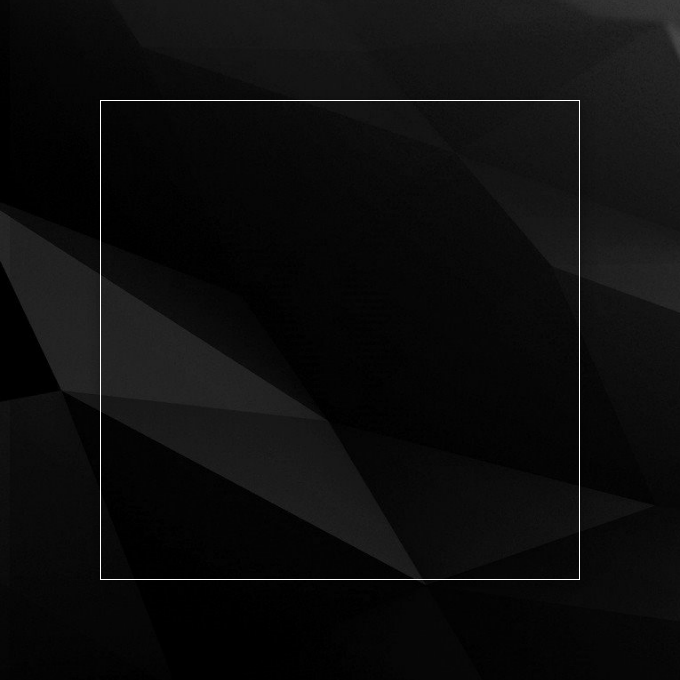
Our ultimate goal is for the visualizer to look like it’s “floating” on the desktop. Here’s what our window looks like normally:
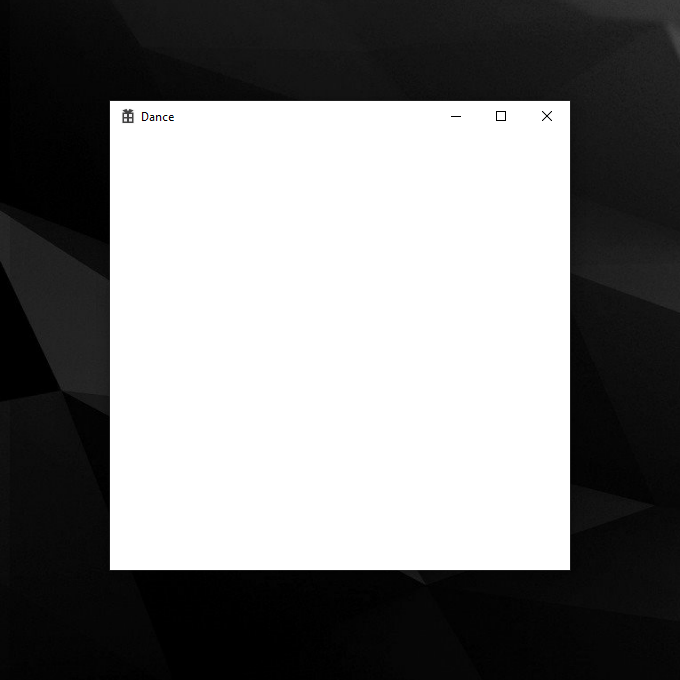
All we need to do is prevent the menu bar and borders from appearing.
In terms of window creation, this is as simple as using a dwStyle that includes WS_POPUP | WS_MINIMIZEBOX.
The nuance is that we also have to modify how our window responds to
WM_NCCALCSIZEevents, which request a physical resize, andWM_NCHITTESTevents, which are used for hit window detection for the mouse, etc.
This is a pretty short class; you can look at the source for details. But despite its size, it makes all the difference.

References:
- StackOverflow answer regarding borderless windows
- Example borderless window code on Github
Establishing Transparency
Making our window transparent while still providing a canvas to draw on is where things start to get interesting. The code I wrote for this class is largely based on a detailed article about the Windows composition engine written by Kenny Kerr in 2014.
Before reading this section, I’d recommend skimming the relevant header and source.
I’ve tried to organize the class hierarchy in a way that makes the TransparentWindow as concise and readable as possible, and it should fill any gaps in the following discussion.
To get started, we’re gonna need a wide array of graphical resources.
You’ll notice that all of these are managed by ComPtr’s so I don’t have to worry about manually releasing them when contextually appropriate.
Use ComPtr wherever possible!
- The
ID3D11Deviceis the central pillar of our rendering pipeline. It serves as a handle to our graphics device and allows us to make graphics calls. While theD3Dportion does stand for DirectX 3D, we use this device indirectly for 2D and composition stuff as well. - In the same breath, we’ll materialize a reference to our
ID3D11Deviceas aDXGIDevice. DXGI is a middleman for low-level graphical operations, and if I understand correctly, it allows multiple rendering contexts to interoperate. We need it because we want to do window composition plus 2D and/or 3D rendering using the same surface. - Next, we’ll create a
IDXGIFactory2, which will allow us to instantiate our swap chain. I’m still not sure about why we need the2, but fuck it. It works. - We can now invoke
IDXGIFactory2::CreateSwapChainForCompositionto create ourIDXGISwapChain1. A swap chain is a series of graphical buffers used to efficiently display content on screen. If you’re curious about why we need this, Microsoft swap chain docs got you. This swap chain will ultimately be the target of our composition pipeline as well as any 2D or 3D rendering done by our visualizers.
Speaking of which, we’ve arrived at composition, which was admittedly kinda “black box” for me.
If you’re curious about how this stuff works under the hood, I’d recommend reading through Kenny Kerr’s article and the Microsoft documentation.
All I know is that we need an IDCompositionDevice, an IDCompositionTarget, an IDCompositionVisual, and the following magic spell:
::DCompositionCreateDevice(
    this->dxgiDevice.Get(),
    __uuidof(this->dCompositionDevice),
    reinterpret_cast<void**>(this->dCompositionDevice.ReleaseAndGetAddressOf()));
this->dCompositionDevice->CreateTargetForHwnd(
    this->window,
    true, // Top most
    this->dCompositionTarget.ReleaseAndGetAddressOf());
this->dCompositionDevice->CreateVisual(this->dCompositionVisual.ReleaseAndGetAddressOf());

this->dCompositionVisual->SetContent(this->dxgiSwapChain.Get());
this->dCompositionTarget->SetRoot(this->dCompositionVisual.Get());
this->dCompositionDevice->Commit();
Our window will now appear completely transparent, meaning we’ll soon be able to achieve our goal of rendering floating 2D and 3D graphics on our desktop.
With a small addition to our WM_EXITSIZEMOVE event handler that synchronizes the dimensions of our swap chain and window whenever the window is resized, it also behaves completely normally with regard to dragging, resizing, fullscreen, etc.

More references:
- Microsoft’s DXGI overview
- Microsoft documentation on D2 and D3 interoperation via DXGI
- Microsoft swap chain docs
- Kenny Kerr’s article for the third time
No Visualizers?
Now that we’ve slogged through all the prerequisites, we can actually get to the exciting part: the visualizers!
Wait, what?
Why is there nothing happening in the VisualizerWindow header or source?
During the 43rd or 44th overhaul of Dance, I realized that the project inherently lends itself to a very modular architecture.
Instead of writing a static set of visualizers, I could set up a plugin system that would allow users to write their own or download others’ and toggle between them at runtime.
This design allowed me to greatly simplify the core application; instead of doing a bunch of complicated visualization stuff, all it had to do was host a Visualizer* and periodically call Visualizer::Render, Visualizer::Update, etc.
Aside from said plugin system, which I’ll write about in the next post, I was able to move a ton of visualizer-specific code, e.g. rendering classes and audio analysis logic, into static libraries.
Thus, the actual VisualizerWindow is super straightforward, and doesn’t really boast anything worth talking about here.
You’ll notice there’s also some I/O code, but it’s mainly for resize accessibility and the context menu that provides access to the available visualizers.
In other words, we’re pretty much done here.
I’ll throw you a bone and show you what we’re working with, though.

Up next, I’ll be writing in about said plugin system and the project’s overarching design. After that, I’ll probably talk about the audio engine, and then I’ll finally be able to talk about the visualizers!